|
1
|
|
2
|
|
3
|
|
5
|
Type the customer name and press Tab. Additional fields appear.
|
|
6
|
Enter a code to identify this customer in the Card ID field. For more information, see ‘Card identification codes’.
|
If you want to enter more contact information, select Address 2 from the Locations list and enter the additional details. You can enter contact details for five locations.
|
8
|
Click the Card Details tab. You can enter notes about the customer, insert a picture and assign attributes to group and sort the card.
|
|
9
|
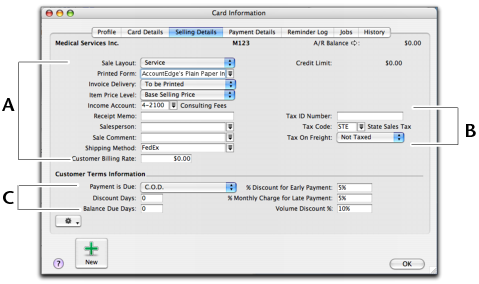
Click the Selling Details tab and enter your selling details.
|
|
10
|
Click the Payment Details tab and select the method of payment your customer will use to pay you.
|
If you intend to use the Merchant Account Service to authorize and process credit card sales from within your software, it is easier to add the credit card information while entering the sale. See Credit card payments using Merchant Account Service.
|
11
|
[Optional] Click the Jobs tab and create a new job for each job you have started or are about to start for the customer. For more information about jobs, see Jobs.
|
|
12
|
[Optional] Click the History tab and type the dollar value of the sales made prior to your conversion month. You can also type or select the date that the contact became a customer.
|
|
13
|


