Forms > Adding and editing elements > Adding and editing data and label elements
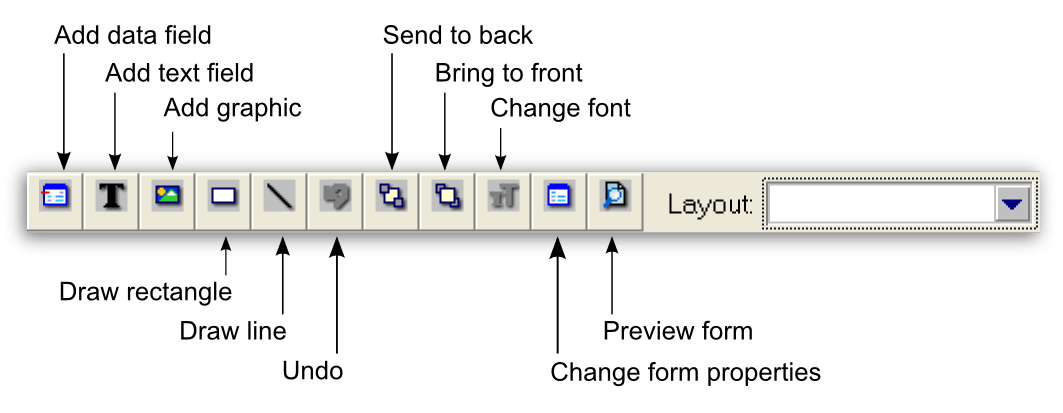
Adding and editing data and label elementsYou can add elements to, and change elements on, a form using the tool palette shown below:note : Layout selectionThe Layout list only appears for check forms.
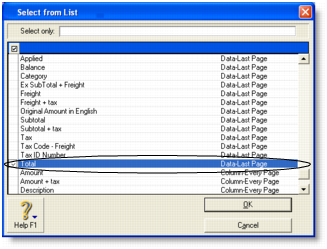
1 Click the add data () button. The Select from List window appears. This window lists all the data fields available for the form you selected.The column on the right indicates the field type (Data, Column) and where it appears on a form. For example, the Total field only appears on the last page (as shown).For more information about the data fields that are available in each form type, see Form fields.
2
3 Click OK. The selected data fields appear on the form.
1 If you want to change the properties of a data field, double-click it. The Field Properties window appears.The Field Properties window has two tabs: the Layout tab where you specify the text, format, background colour, location, and size of the field, and the Borders tab where you specify the layout, colour, and width of the field’s borders.
1 Click the add text button () and then click on the form where you want to place the text field. A new text label named Text Field appears.
2 Double-click the field. The Field Properties window displays the Layout tab where you specify the text content, location and size, text format, and background colour of the field, and the Borders tab where you specify the layout, colour, and width of the field’s borders.
3 If the text is longer than the size of the field, you may need to resize it—see Editing all elements with common commands.
1 Double-click the text label. The Field Properties window appears.
2
3 Click OK.
1 Double-click the data field or text label to be changed. The Field Properties window appears.
2
3
a
b
5 Click OK.