


|
To use the Easy Setup Wizard
If you haven’t already read the Easy Setup Wizard Overview, see To prepare to use the Easy Setup Wizard and To start the Easy Setup Wizard for more information.
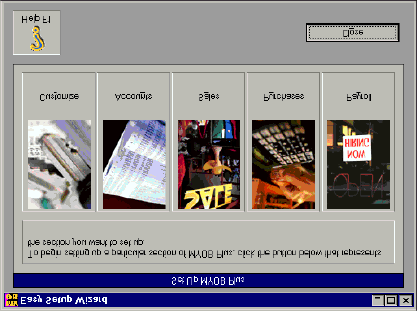
When you open the Easy Setup Wizard, the main wizard window will appear. This window , which looks like the following illustration, is the “launchpad” for your setup tasks. You’ll start each part of the Wizard using this window.
To begin setting up a particular section of the Wizard, click the button that’s associated with the section you want to set up. The Wizard will walk you through the section in a step-by-step manner, like the process you went through to create a new data file in the New Data File Wizard.
If you need to know more about a particular step in the Wizard, be sure to click the Help button at the bottom of the Wizard window.
The entries you make in the Customize portion of the Easy Setup Wizard will appear in Accounting Plus’s Preferences window. With a few exceptions, the entries you make here can be changed anytime you like using either the Easy Setup Wizard or the Preferences window. Default selections have been chosen for you so it’s not essential that you complete this part of the Easy Setup Wizard, but it’s wise to review the default selections to be sure they match the way you do business.
If you conduct business in currencies other than Canadian dollars, use this section to select the “I Deal in Multiple Currencies” selection; Accounting Plus’s Multicurrency feature is available only if this selection is marked.
Some options are marked system-wide; these options apply to everyone who uses Accounting Plus. Any option without this label is specific to you (based on the user ID you entered when you opened the data file), and you might choose different options than those chosen by your coworkers.
If any options are unclear to you, click the Help button in the lower left corner of the Easy Setup Wizard; the MYOB Learning Center will appear with information about the options displayed.
When you created your data file, you chose a chart of accounts for your company. Chances are that the chart of accounts includes most of the accounts you’ll need to track your transactions and print important financial statements, but a few changes may be needed to ensure the chart of accounts you chose is complete and accurate for your business. You can use the Accounts section of the Easy Setup Wizard to tailor your chart of accounts to your company’s specific needs.
The steps in this part of the Easy Setup Wizard will walk you through adding, changing and deleting accounts. When your account list is complete, you’ll enter beginning balances for the accounts -- these are the accounts’ balances on the first day of your conversion month (the month that you begin entering transactions in Accounting Plus).
You’ll also review the accounts that have been selected for historical balancing and undeposited funds. The historical balancing account is used during the setup process to track the difference between the opening balances you'll enter for your asset accounts and the opening balances you'll enter for your liability and equity accounts. In traditional accounting terms, assets should always equal liabilities and equity; Accounting Plus doesn't allow unbalanced transactions (transactions whose debit and credit amounts aren't equal) to be recorded, but this account allows you to continue to use Accounting Plus if your beginning balances aren't balanced. The undeposited funds account is used for the money you receive from customers (and other sources) until you deposit the funds in a checking account or some other bank or financial account.
As with the Customize section of the Easy Setup Wizard, you can click the Help button anytime you like to learn more about the task you’re completing or the window that’s displayed.
In the Sales and Purchases sections of the Easy Setup Wizard, you’ll enter the names of your customers and vendors, along with other important information about them. You’ll also choose the credit terms you most often extend to your customers and receive from your vendors; these selections can be changed for individual customers and vendors who have other terms. You’ll also enter historical sales and purchases; these are the sales and purchases that were made before the start of your conversion month but haven’t been fully paid yet.
In the Sales section, you’ll also select a form layout that matches the type of invoices you issue most often -- service, item, professional, time billing or miscellaneous. And you’ll have the chance to review the accounts that are being used to track your sales and purchases. Accounting Plus provides default entries for you to use, but you’re free to select other accounts if you like.
If you plan to use Accounting Plus’s Payroll features to print paychecks for your employees, use the Payroll section of the Easy Setup Wizard to set up your company’s tax information, the payroll categories (wages, deductions, accruals and employer expenses) your company uses and similar information, along with employee records and pay history for each employee for the current year. As part of the process, you’ll identify the payroll categories that apply to each employee. As in other areas of the Easy Setup Wizard, you also can review the default accounts that have been selected for your payroll transactions and change them if necessary.
To use the Easy Setup Wizard