Index

Forms > Adding and editing elements > Adding and editing data and label elements
The Layout list only appears for check forms.
Editing elements using the Format window
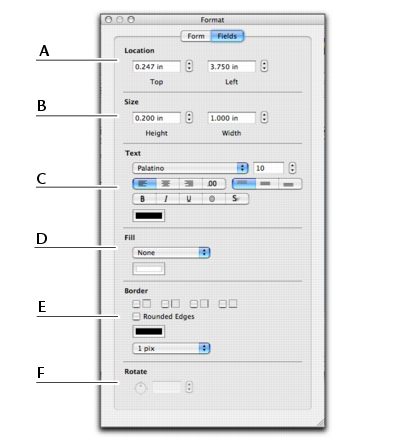
The Format window enables you to change the format of any element on your form. The changes you make are shown on the form immediately. You can leave the Format window open while you work on the form.
The fields available in the Format window change, depending upon which type of field you have selected. The following fields are available when editing text elements.
If you have selected an image element, you can also click Browse and insert a different image in the field.
To add a data field to a form
1
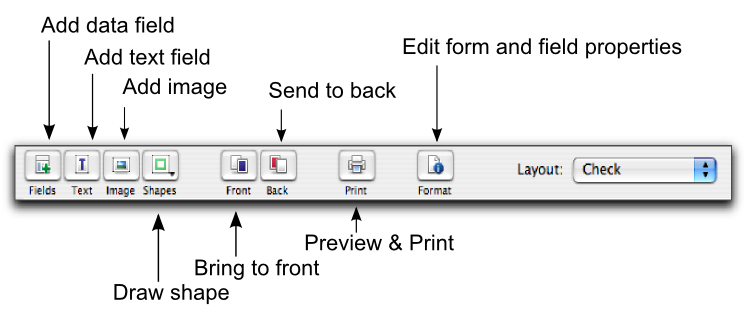
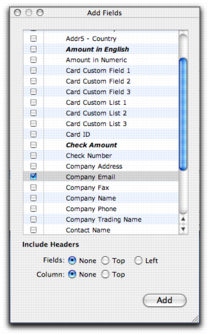
Click the Fields button. The Add Fields window appears. This window lists all the data fields available for the form you selected.
3
If you want to display the data field title at the top of a column or next to a data field, select header and display options in the bottom of the window.
4
Click Add. The selected data fields appear on the form.
Note that the Add Fields window can be left open on your desktop while you are working on the form.
To change the appearance of a data field
2
Click the Format button. The Format window opens.
3
Make your changes in the Format window. The appearance of the data field will be updated as you make selections.
To add a text field to a form
1
Click the Text button. A new Text Field appears.
3
To add text to the field, double-click it. The Custom Text Field window appears.
5
6
In the Fields tab, set the properties of the field, including text appearance, format, background color, borders, location, and size of the field, etc.
To change the text in a text field
1
Double-click the text label. The Custom Text Field window appears.
2
Change the content in the Text field as required.
3
To change the font in a data field or text field
2
Click the Format button. The Format window opens.
3
In the Fields tab, make the required changes.
Top of page